Getting Organized in the New Year

The start of a new year always brings with it resolutions, and the excitement of a fresh start.  As crafters, we're probably all vowing to find more time for ourselves to craft, become more organized, and use the many supplies we've been hoarding, I mean saving.   These are definitely some of the things I have renewed hope of in the new year.

I know, from personal experience, that being organized in my studio has a direct correlation to the amount of time I spend crafting and how much of my supplies I use.  If I can organize my supplies in a way that they are accessible, and easy to find I use more of my supplies, and  I spend more time creating because I'm not discouraged by the amount of time I know I'm going to spend hunting and sifting through supplies.  So, if I can take care of the organization, the rest usually falls into place.

Here are some of my tips on staying organized in the new year:

#1.  Put it away!  Once you're done with a tool or supply put it back.  Spending 10 minutes a day putting things away could save hours of cleaning down the road.  This is probably my biggest problem when I get really disorganized.

#2.  Purge!  Every so often, throw things out.  My hubby had to teach me this rule.  If you look at scrap of paper you've been saving for 10 years, ask yourself, "Would I buy this today?"  If the answer is no, throw it out or give it to a friend who doesn't know how old it is :))  It's recycling.

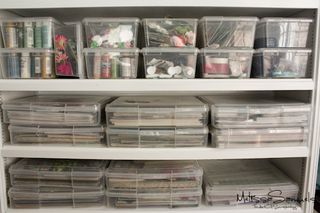
#3.  Clear plastic bins are your friends!   Store papers and embellishments in clear plastic containers so you can see what the heck is in there. If you know what's in there, you're much more likely to use it.  I store paints, punches, flowers, and paper collections this way.

Organizational (1 of 1)-5

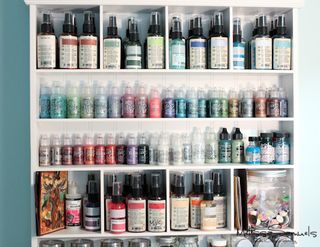
#4.   Accessibility is key!  Keep things within easy reach that you use all the time.  I store my Glimmer Mist, Stickles, adhesives, and art supplies on shelves of an open wall organizer close to my desk so that I can easily grab the things I find myself using repeatedly.

Organizational (1 of 1)

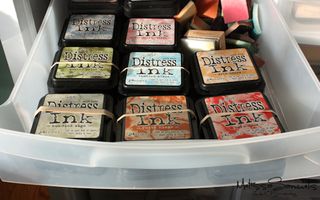
#5.  Birds of a feather stick together!  Plastic drawers are a wonderful and inexpensive way to organize supplies.  Dedicate each drawer to like things.  I store my Distress Inks with my blending tools and foam.  I store my alcohol inks with my felt.  For like things that I have too many of to store in just one drawer, I still keep them in close proximity.  So I have a drawer (or 2) of block stamps, above that I have a drawer of arylic stamps, and above that I keep dye, chalk, pigment, and permanent inks.  This way I'm not walking back and forth across the room gathering supplies.  This takes value time we could use for crafting.

Organizational (1 of 1)-3

#6.  Color, color, color!  I organize almost everything by color, including ribbon, Stickles, Glimmer Mist, extra cardstock, brads, buttons, paints, inks, you name it.  When I'm working on a specific project, it's so much easier to find what I need if it's organized this way. 

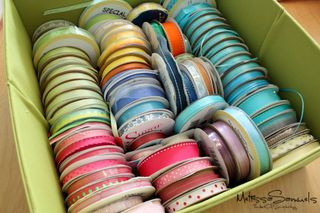
#7.  Don't be a fool, organize the spool! Okay, that was horrible, but it rhymes.  If you're a ribbon junkie like me, stand spools of ribbon up in a shallow container.  You'll be amazed at how many spools you can get into a container, and when you're ready to use them you can see exactly what you have.  I store my containers on a shelf.
Organizational (1 of 1)-2
#8.  Shop smart!  Buy your paper collections with embellishments, ribbon, and coordinating cardstock all at once, and store them together in clear, plastic containers or bags.  When you're ready to create a specific project everything that you need is in one place.

#9.  Find it a home when you get home!  Whenever you buy new supplies, as soon as you get home put them away.  If you go on a shopping spree, pick up an extra storage container or two.  You'll be glad you did when you get back home.

#10.  Trash it!  Throw out packaging and trash.  Sounds simple, I know.  Often times when I clean my desk, I find out that half of the mess is trash:  tiny scraps of paper, Scor-tape backing, ribbon bits, and product packaging.  Keep a trash can within arms reach, so that trash doesn't pile up on your workspace.

 Hopefully, these tips will help you become more organized, and in turn you find yourself creating more.  Happy New Year!

Melissa Logo 55

Linked:
giveawaysLife as LoriHookingupwithHoHSuzy's Artsy Craftsy SitcomBCD 125Paper Issues Blog DesignBlack Kats DesignA Crafty SoireePassionatelyartisticlinky

Thank You Cards

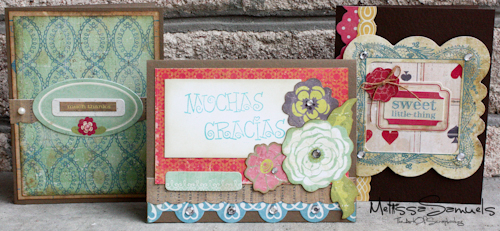
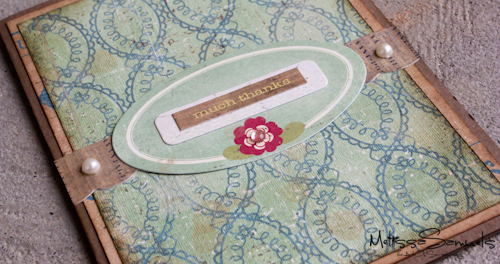
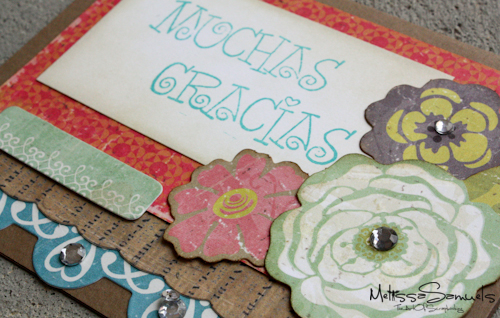
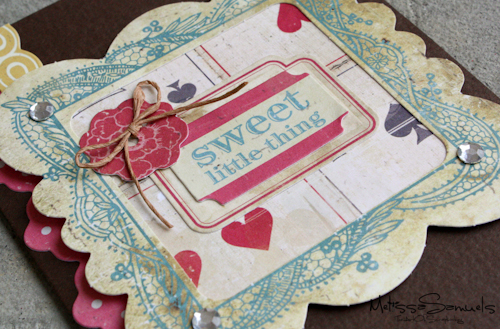
Now that Christmas is over, and the gifts have been given, it's time to send out those thank you cards.  If you just sighed, and thought, "But, I'm still tired from wrapping and entertaining!"  Not to worry, I've designed 3 very simple and easy cards using Crate Paper's Restoration Paper Kit.  If you don't have Restoration, just use the cards as sketches with whatever paper you have.  They are my thank you to you for following my blog, leaving comments (love that!), and being a fan on Facebook.  Love you guys!
Thank You Cards (1 of 1)

Thank You Cards (1 of 1)-3

Thank You Cards (1 of 1)-2
Thank You Cards (1 of 1)-4
Looking for something more whimsical?  Check out the card I made for Passionately Artistic as a design team member.  They are having their Linky Party today too, so don't forget to link up!

Melissa Logo 55
Linked:

Paper Issues Blog DesignCherry World 1 Passionatelyartisticlinky

Tag Tutorial

Recently, I purchased a Big Shot because I had to have the Tim Holtz dies and embossing folders! Since I have a defunct Epic 6, and I'm not at all a diecut person, I was a little apprehensive about investing in another diecutting machine.  However, the Big Shot is a work horse of a machine-it's nice and sturdy, and cuts so smooth and easily.  Tim Holtz has made a believer out of me with his dies and embossing folders!  His Alterations line is da bomb!

I thought I'd do a quick and easy tutorial on one of the many uses of the Alterations embossing folders

Here's what you'll need:

Sizzix Tim Holtz Alterations Texture Fades-Sheet Music & Diecutting Machine

Acrylic Paint & Pigment Ink

Distress Ink-Vintage Photo   & Blending Tool with Foam

Crop-a-dile Wide Large Eyelets

Flowers

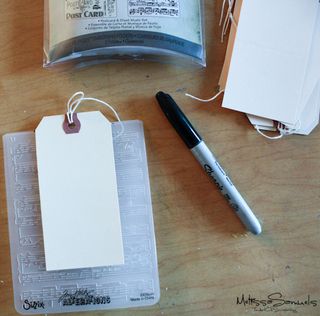
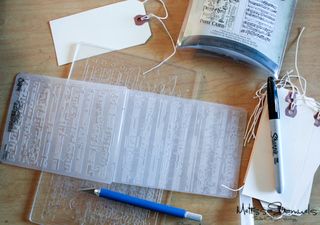
Tag (1 of 1) To make embossing the tag easier, make a slit in the fold of the folder and pull the top of the tag through.  Do this by making a mark on the folder where the tag is square.

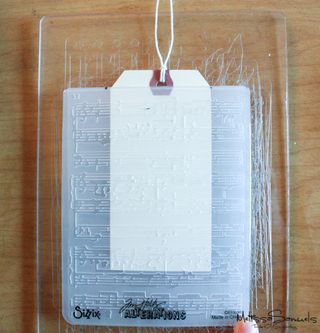
Tag (1 of 1)-2 Using a craft knife, cut a slit in the middle of the folder where the marks are.

Tag (1 of 1)-3 Insert your tag, and you're ready to embossing! Put your folder between two cutting mats.

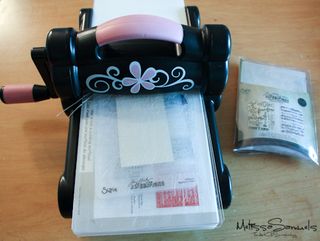
Tag (1 of 1)-4 Place your "sandwich" on the platform and crank it through.

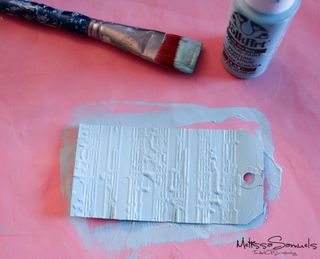
Tag (1 of 1)-5 Paint the tag with acyclic paint.  For those of you who are like me and can't wait for it to dry, you can use a heat gun.  Not too close though!

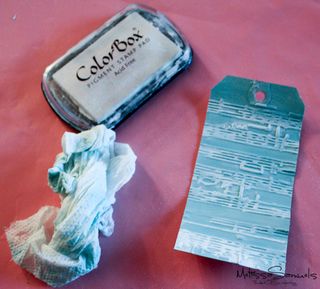
Tag (1 of 1)-6 Rub white pigment ink over the raised embossed area.  If you get too much on the flat surface just wipe it off with a wet paper towel before the ink dries.  Heat set the ink with a heat gun.

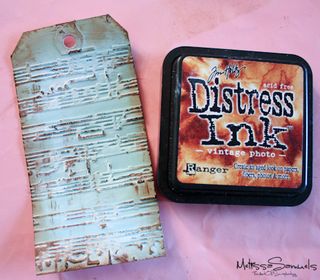
Tag (1 of 1)-7 Using a blending tool, distress the edges with Vintage Photo Distress Ink.  To get more color variation, rub the ink pad over the raised embossed area.  Pretty simple, uh?!

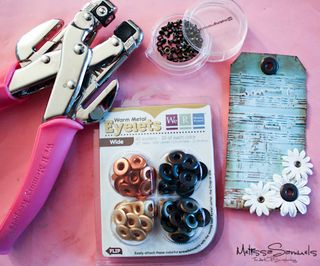
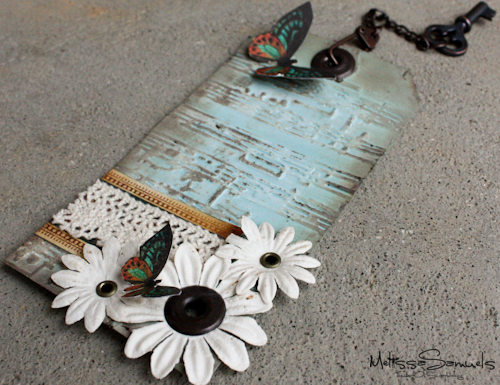
Tag (1 of 1)-8 To decorate, I used some Prima flowers that I set with wide eyelets, and I set one through the string hole, too.  I used some scrap pieces of paper from my 8×8 Steampunk Debutante pad, scrap lace, and hardware to add some finishing touches. 

Tag (1 of 1)-9
Melissa Logo 55 Linked:

Paper Issues Blog DesignBCD 125

2010: Year In Review

Happy New Year's Eve Everyone!  It's been an amazing year for me filled with creative growth and lots of adventure.  I've enjoyed sharing projects and tutorials with you, and today I want to share some of my personal favorite project blog posts from this year.  I hope you enjoy!  (Click on  the blog post dates to view the original post)

Bobunny feb. 2nd card-1-2
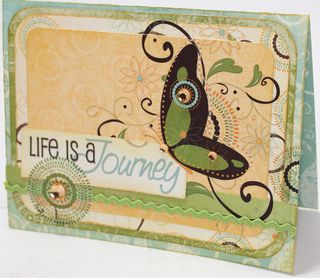
This one is very fitting because of the title "Life is a Journey."  So very true!  This is a card that I made for BoBunny's card challenge (my first ever card challenge entry), and I won!  This felt like the beginning of great things.  Blog post February 19, 2010

____________________________________________________________________

This is a simple ribbon flower YouTube tutorial that I blogged about May 3, 2010 and was a huge hit.  To date, it has had almost 23,000 views! 

___________________________________________________________________

Butterfly Kisses Mini Album 1 This is definitely a favorite mini album!  I just love the colors, bling, flowers, and hardware.  It was a merger of all of my favorite scrapbook things.  Blog post June 26, 2010
__________________________________________________________________


This was my all time favorite YouTube video I shot.  It took hours to edit it down to the 10 minute time constraint, but well worth it!   I love flowers, and I thought it would be fun to recreate some of my Prima favorites.  Blog post July 11, 2010

___________________________________________________________________

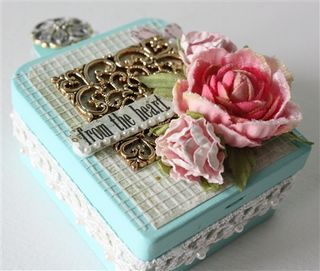
Memory box-1-7 This was a blog tutorial I did on recycling a Memory Glass box into a shabby chic gift box.  It was awesome because Ranger Industries tweeted about it, and Suze Weinberg left a comment!  Exciting!  Blog post August 18, 2010.
____________________________________________________________________

August Challenge Webster's Pages-1-2 This is one of my favorite cards!  I made it using Webster's Pages papers and stickers.  Cards are the best because they're quick and easy.  Blog post August 21, 2010.

___________________________________________________________________

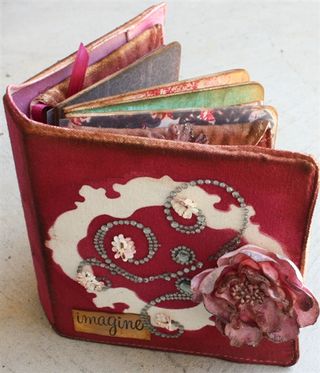
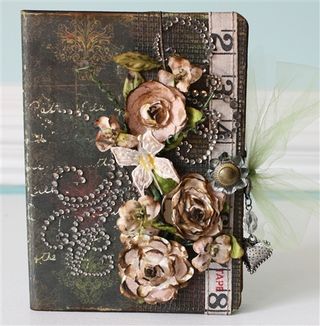
Canvas book-1-3 I really enjoy working with canvas, and Glimmer Mist is one of my favorite products, so of course this little guy made the list.  It was also published in Scrapbooking.com Magazine.  Blog post September 8, 2010.
__________________________________________________________________

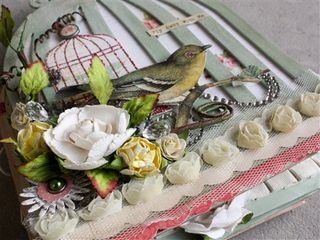
Birdcage Album-1-11 This album is in the shape of a birdcage, need I say more?!  I offered this as a kit with written instructions.  It was very popular, and I still get blog hits on this post.  Blog post October 5, 2010.

___________________________________________________________________

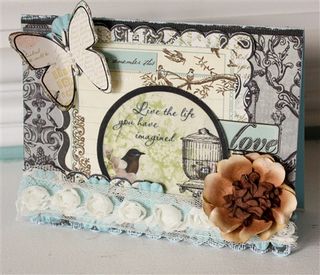
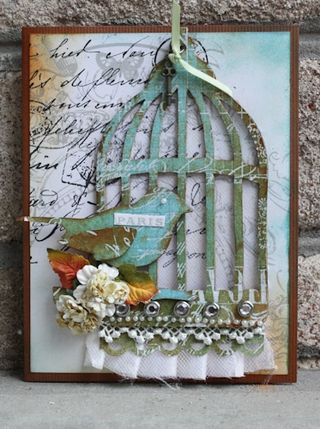
Birdcage card-10 I love this card because I thought the Pink Paislee Parisian Anthology paper I used was just like magic!!  I know, it doesn't take much to entertain me.  It was a fun tutorial.  Hero Arts tweeted about it.  Blog post October 20, 2010.
___________________________________________________________________

Fancy pants mixed media album-1-3 I just adore this album for it's mixed media pages and soft colors.  I love the corrugated paper, felt, mirrored paper, chipboard, and canvas together.  I used acyclic paint and lots of rub-ons, again some of my favorite scrapbooking things.  It was featured on Passionately Artistic.   Blog post November 2, 2010.
___________________________________________________________________

Tattered angels-2tagalbum I made this using Tattered Angels Trinket Tags and Glimmer Mist.  Love it!  It was also special because I put pictures of our trip to Shenandoah in it.  It was featured in Two Peas In a Bucket's newsletter.  Blog post November 16, 2010.
__________________________________________________________________

Fancy pants layout-1-2 This was the first layout I had done in a really, really long time.  I was glad to learn I could still do it!  It was featured on Fancy Pants Designs' blog. Blog post  November 26, 2010.

___________________________________________________________________

Thank you all so much for sharing this journey with me, and for your love and support!!!   I am looking forward to another year filled with even more creativity and inspiration!

Melissa Logo 55Linked:

My Repurposed LifeBest of Tickled Pink at 504 MainChic on a Shoestring Decorating

calm+breeze+banner+friday.jpgmonogramPhotobucket

Photobucket PassionatelyartisticlinkyBCD 125

Cut -N- Dry Custom Stamp Pad Tutorial

Hey Guys!  I have a super easy and fun tutorial for you today.  I was fortunate enough to watch Tim Holtz do this at CHA this summer, and I thought I'd share this super easy technique with you.  We're going to make our own custom stamp pad! 

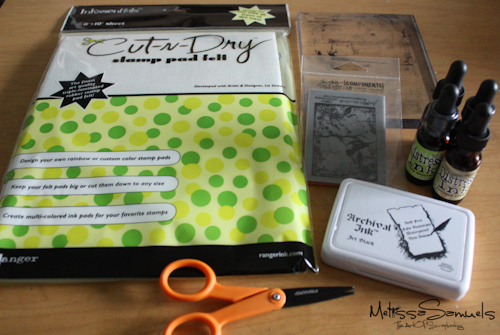
Cut n dry felt card (1 of 1) We start with Cut -N- Dry Felt (not to be confused with Foam).  It's the same felt material that Distress Ink stamp pads are made out of, only uninked.  Cut -N- Dry Felt is available for purchase in my shop.  While you're in the store be sure to watch the video I took of Tim Holtz doing this technique.   You'll also need Archival Ink, Distress Ink Reinker, scissors, and stamps.  Stampers Anonymous stamps designed by Tim Holtz are perfect for this technique.  They can also be found in the shop.

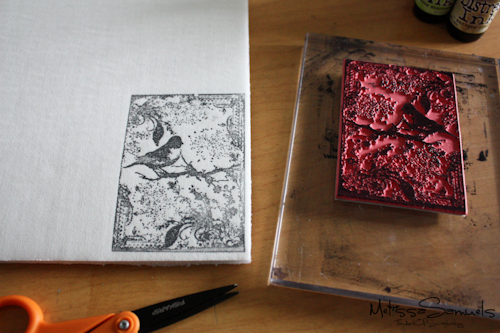
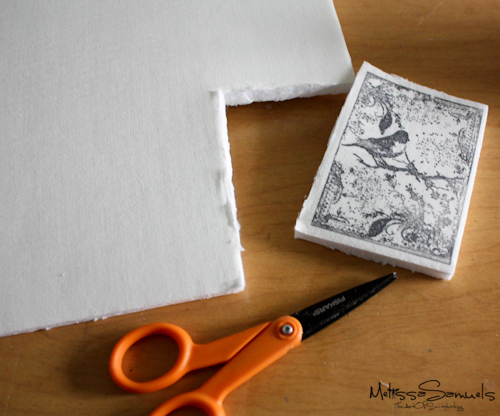
Cut n dry felt card (1 of 1)-2Stamp the image onto the felt (linen textured) side up with Archival Ink.  I used Archival Ink because it's a permanent ink that won't bleed when we apply the reinker.  (I used the Tim Holtz {Components} Tattered Sparrow stamp)

Cut n dry felt card (1 of 1)-3 Cut out your stamp pad.  You'll have lots of felt left over for more stamp pads!

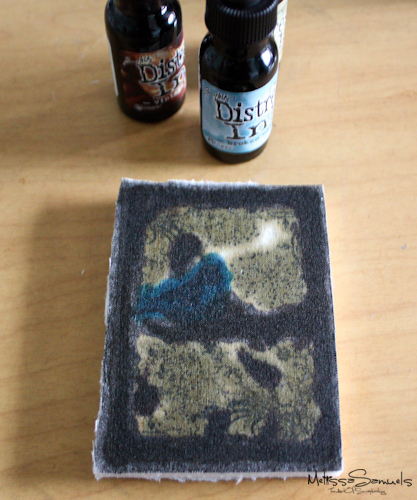
Cut n dry felt card (1 of 1)-4 Ink it up!  Put Distress Ink Reinker along the black lines of the stamped image.  Don't worry if it gets messy.  I used Vintage Photo around the frame, branch, and to highlight some of the leaves.  I used Broken China on the bird, and filled in with Antique Linen everywhere else.

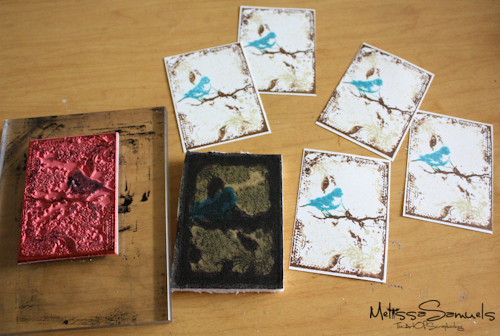
Cut n dry felt card (1 of 1)-5 Stamp away!!  You can get tons of use from the same stamp pad!  And, it's quick.  I stamped these out in about 60 seconds.  This is a great technique for cards you need to make in bulk, or ATCs for swaps.

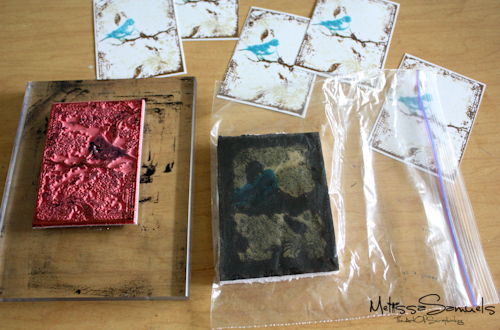
Cut n dry felt card (1 of 1)-6 When you are finished, put your stamp pad in a plastic baggie or air tight container to use the next time you need a quick stamp.


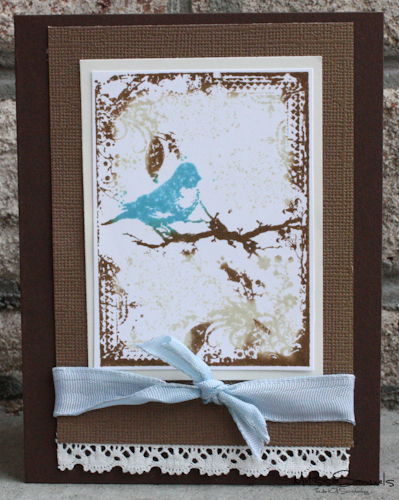
Cut n dry felt card (1 of 1)-7 Here's a card I made in about 5 minutes using one of my stamped images.  Pretty handy, huh?!

Melissa Logo 55Linked:

HookingupwithHoHGet your craft on Thurs.

Suzy's Artsy Craftsy SitcomPaper Issues Blog Design PassionatelyartisticlinkyBCD 125